
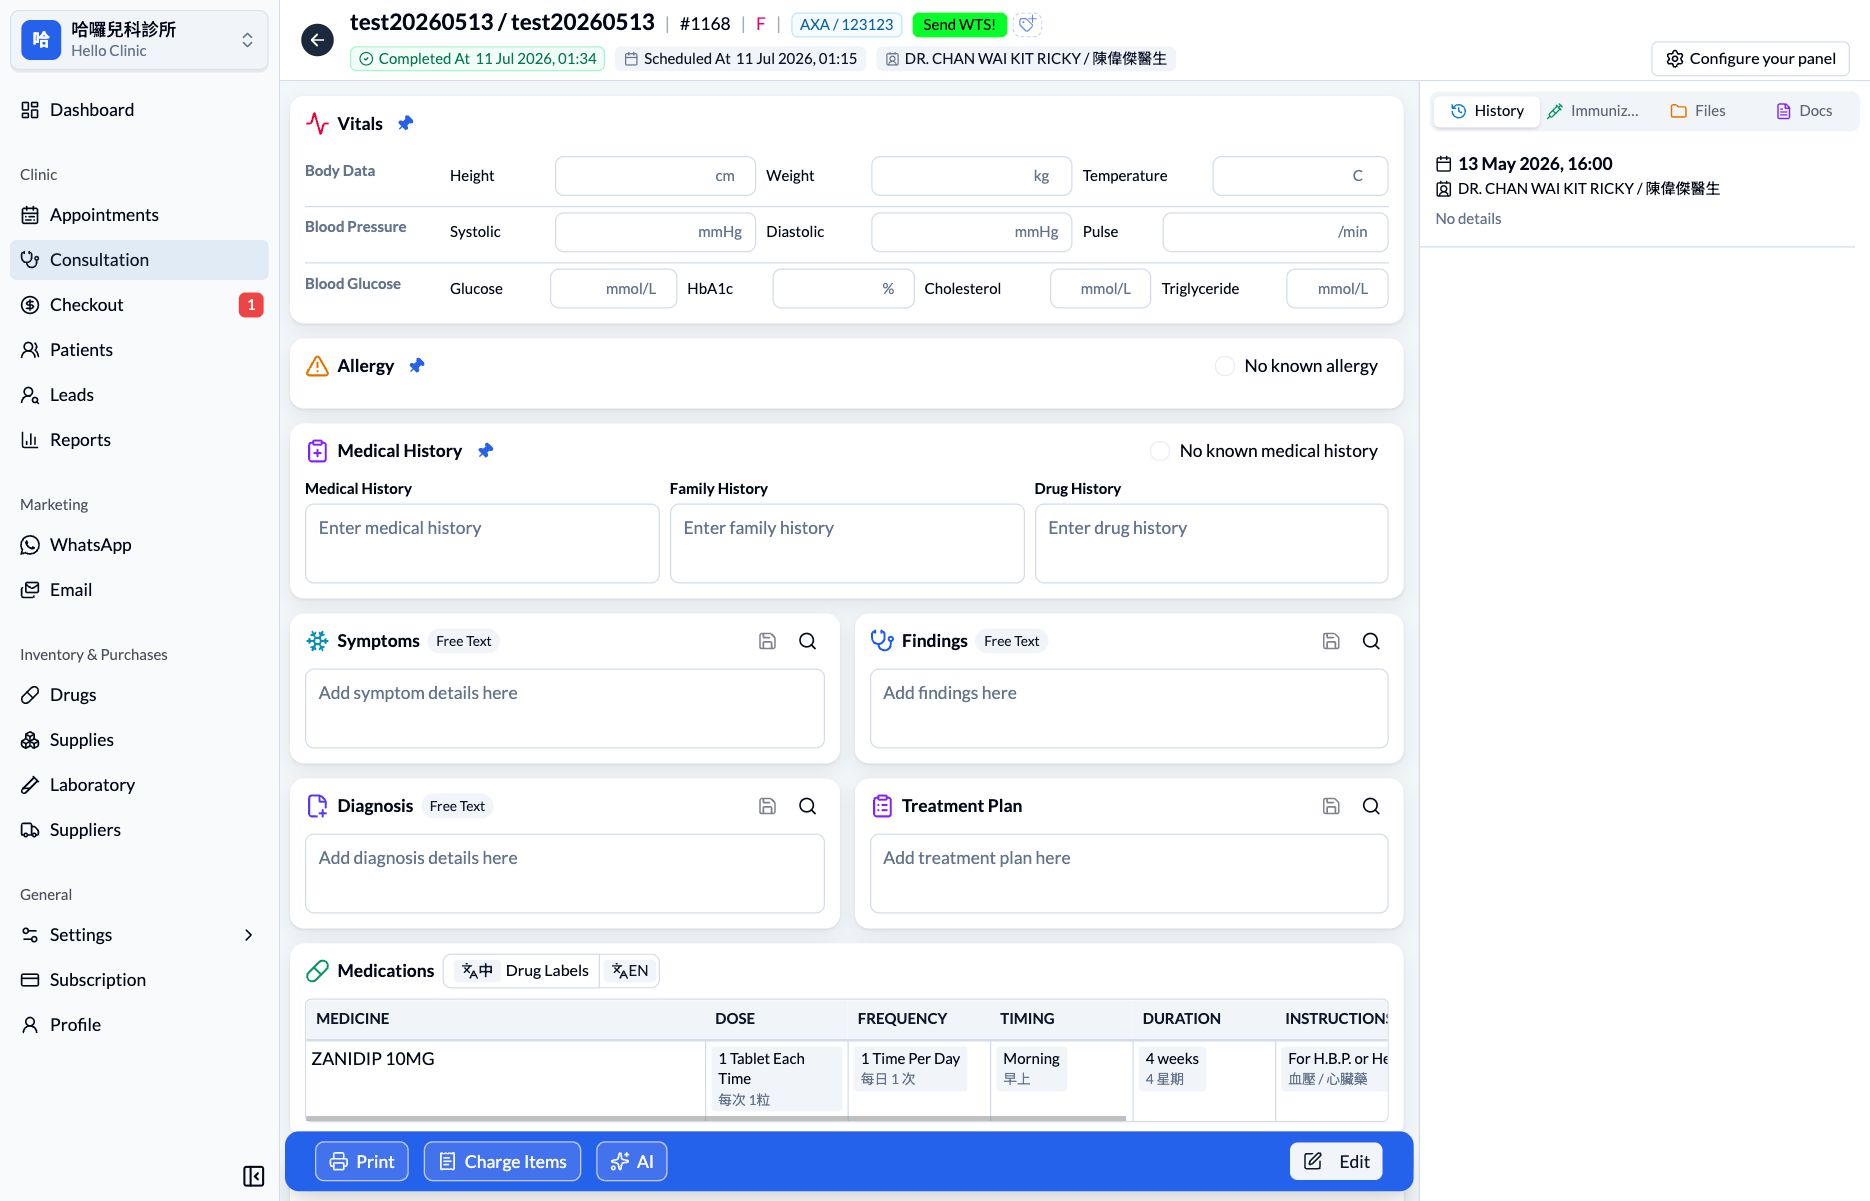
This product update refines the consultation flow doctors use most: from the consultation list and starting a session through clinical documentation, prescribing, and payment. The Consultation Workspace now has a clearer information hierarchy and a more focused working rhythm, so key information and actions are easier to find.
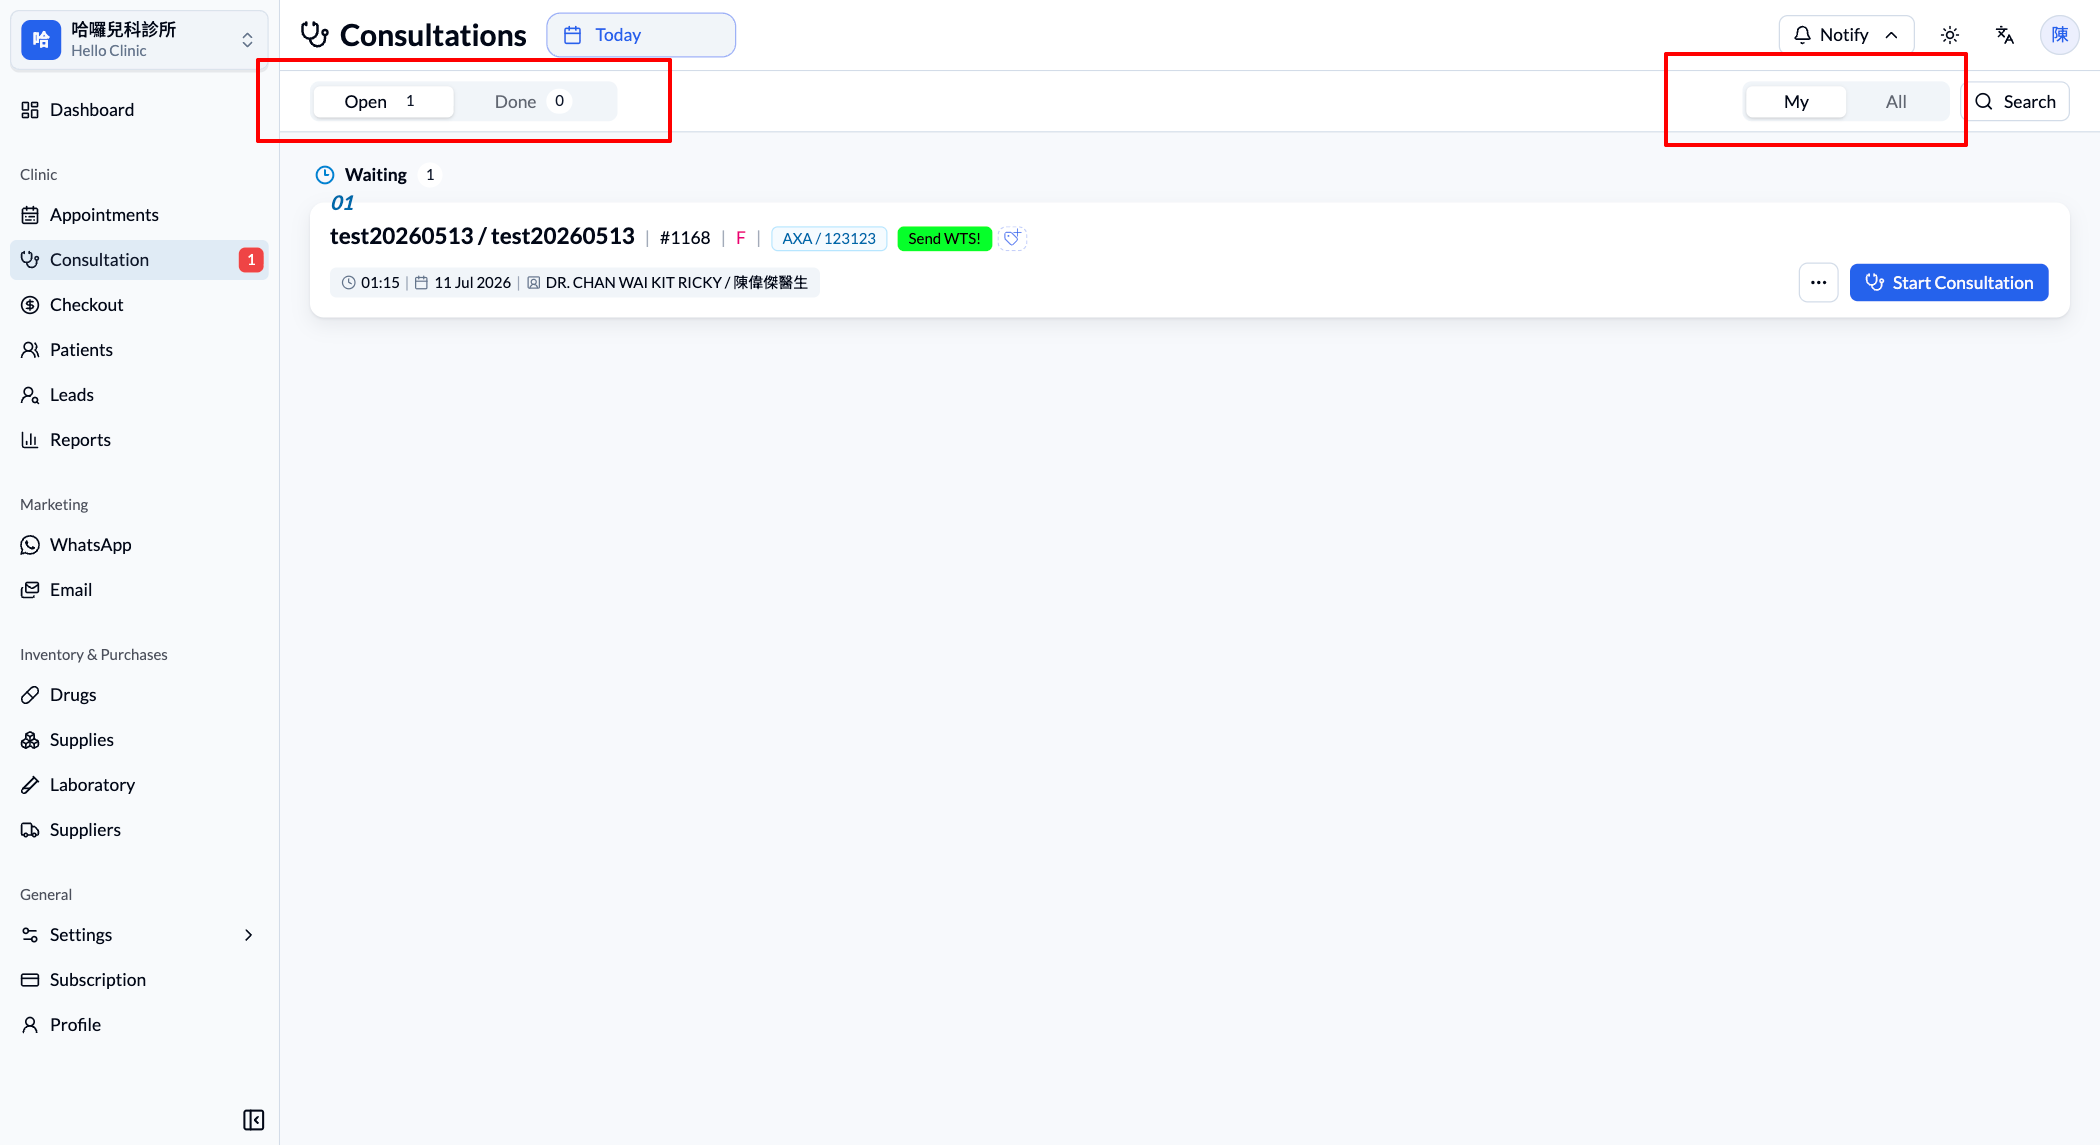
1. Filter patients with Open, Done, My, and All before a consultation
In Consultation, doctors can filter patients at the top of the page by consultation status and assignee:
- Open: View consultations that are not yet complete.
- Done: View completed consultation records.
- My: Show only patients assigned to you.
- All: View all relevant consultations in the clinic.
Use the search control on the right to narrow the list further and quickly find the patient you need to see.
2. Start Consultation marks the beginning of the session
Each consultation card clearly shows the scheduled time, patient details, and assigned doctor. When ready, select Start Consultation to create the start status for that visit, so consultations that have not begun are not mistaken for active ones.
3. A workspace for patient context, clinical records, and actions
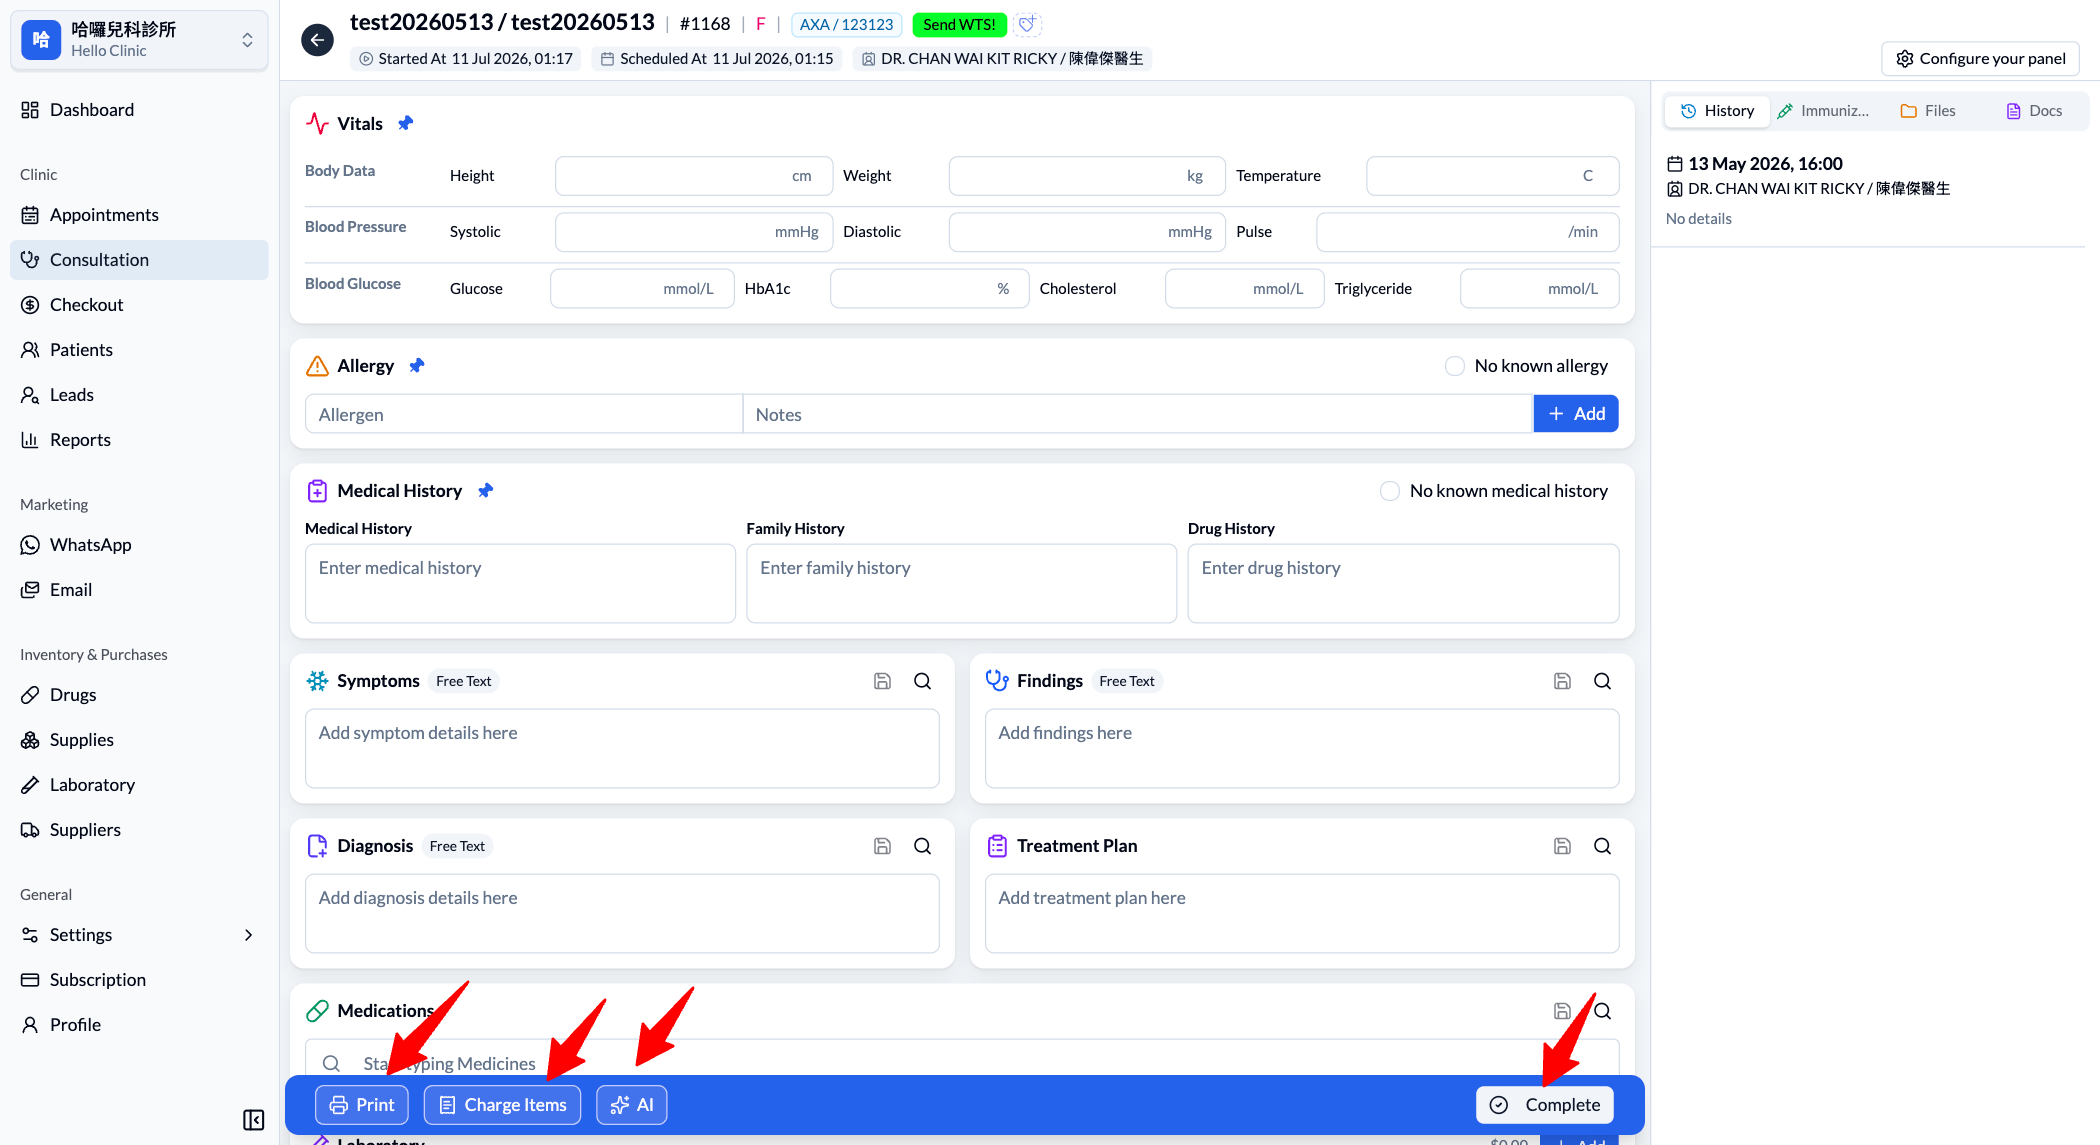
Once inside the Workspace, the screen is organised into three main areas:
- Top: Patient details, consultation number, scheduled time, and start time let doctors confirm the current case at a glance.
- Centre: The current consultation record brings together Vitals, Allergy, Medical History, Symptoms, Findings, Diagnosis, Treatment Plan, Medications, Laboratory, and Notes.
- Bottom: A fixed blue action bar provides Print, Charge Items, AI, and Complete, so doctors can print documents, manage charges, use AI, or finish the consultation without losing their place.
The right panel keeps medical history, immunisation records, and related files close by. Switch between History, Immunization, Files, and Docs without leaving the current record.
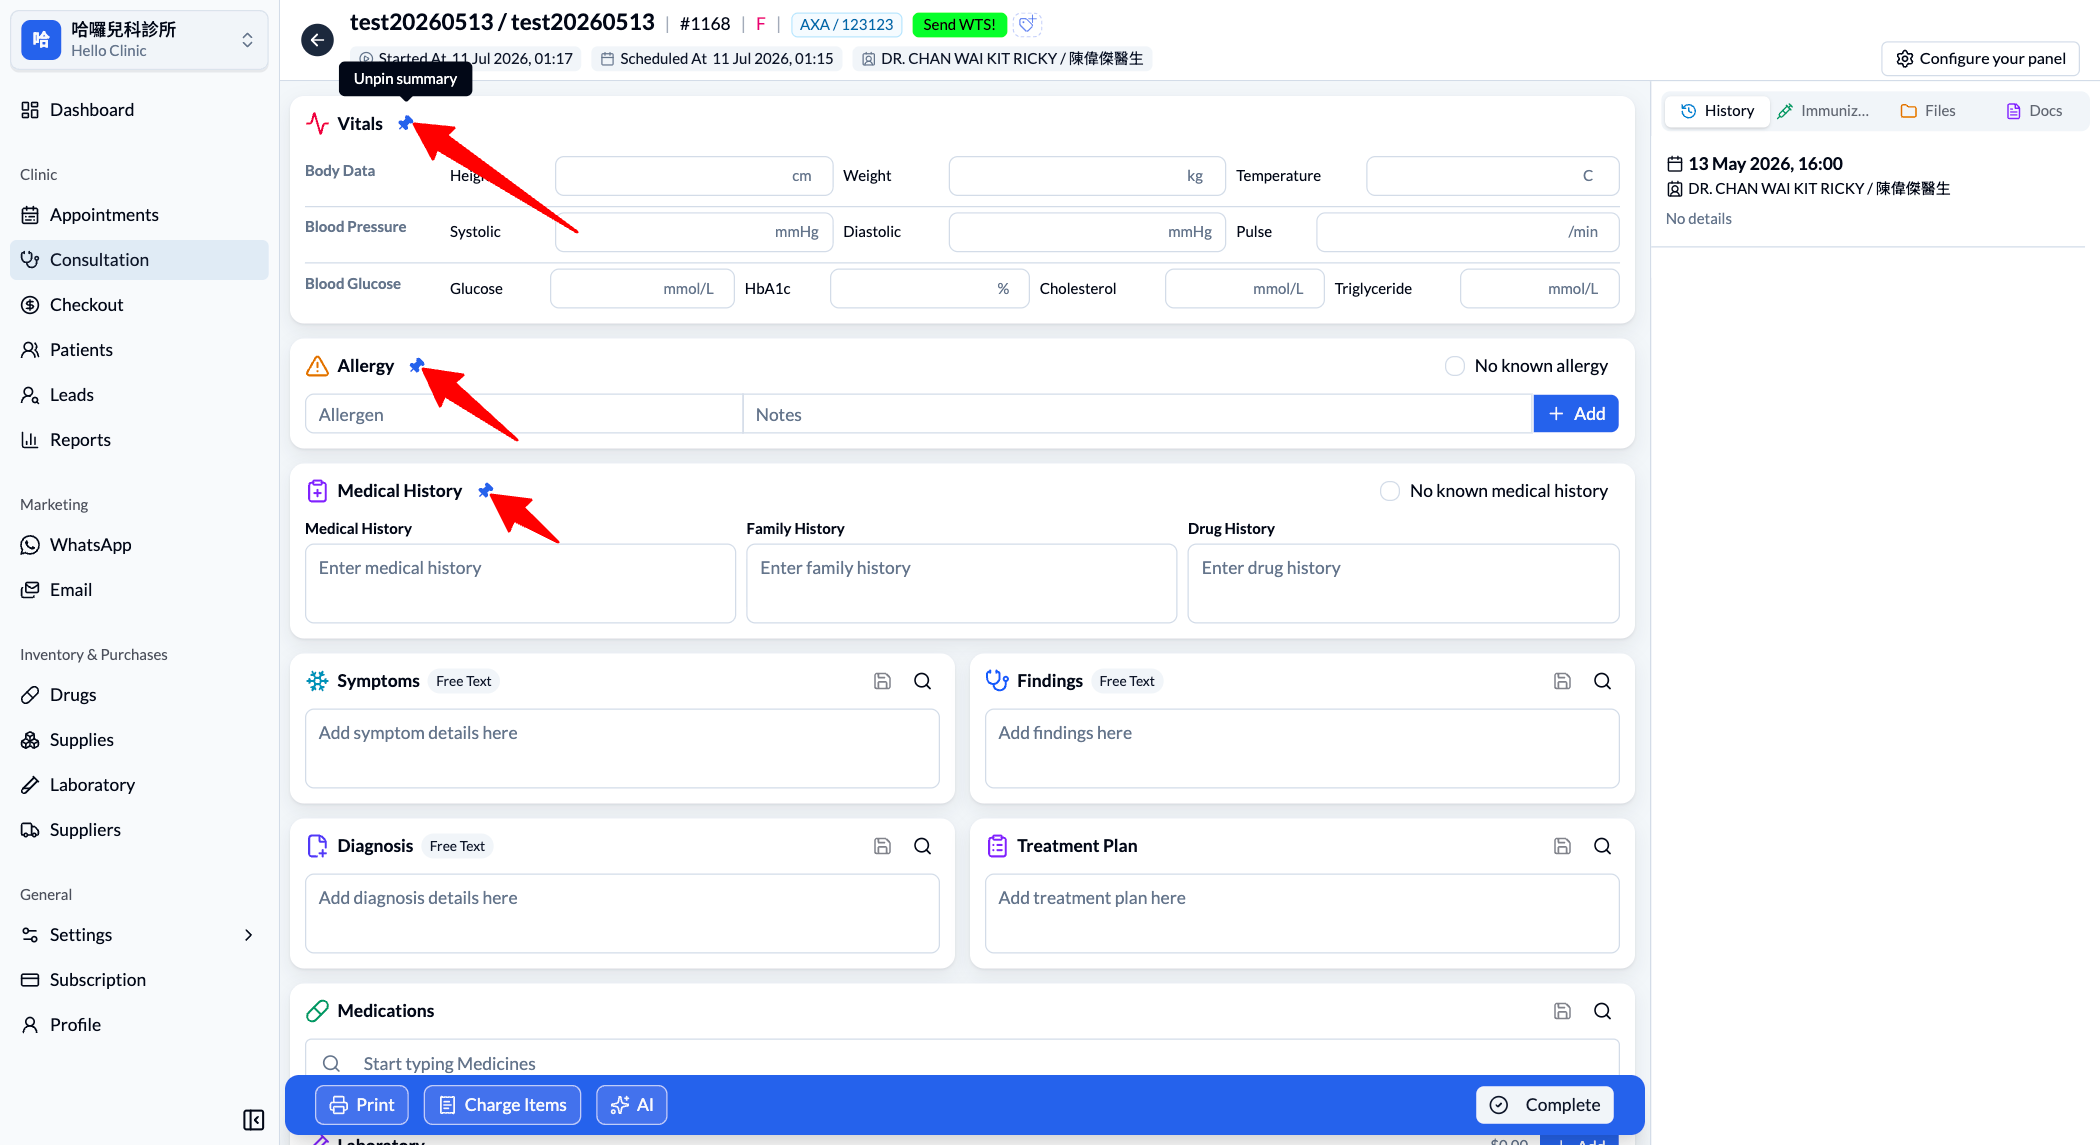
4. Pin Vitals, Allergy, and Medical History summaries
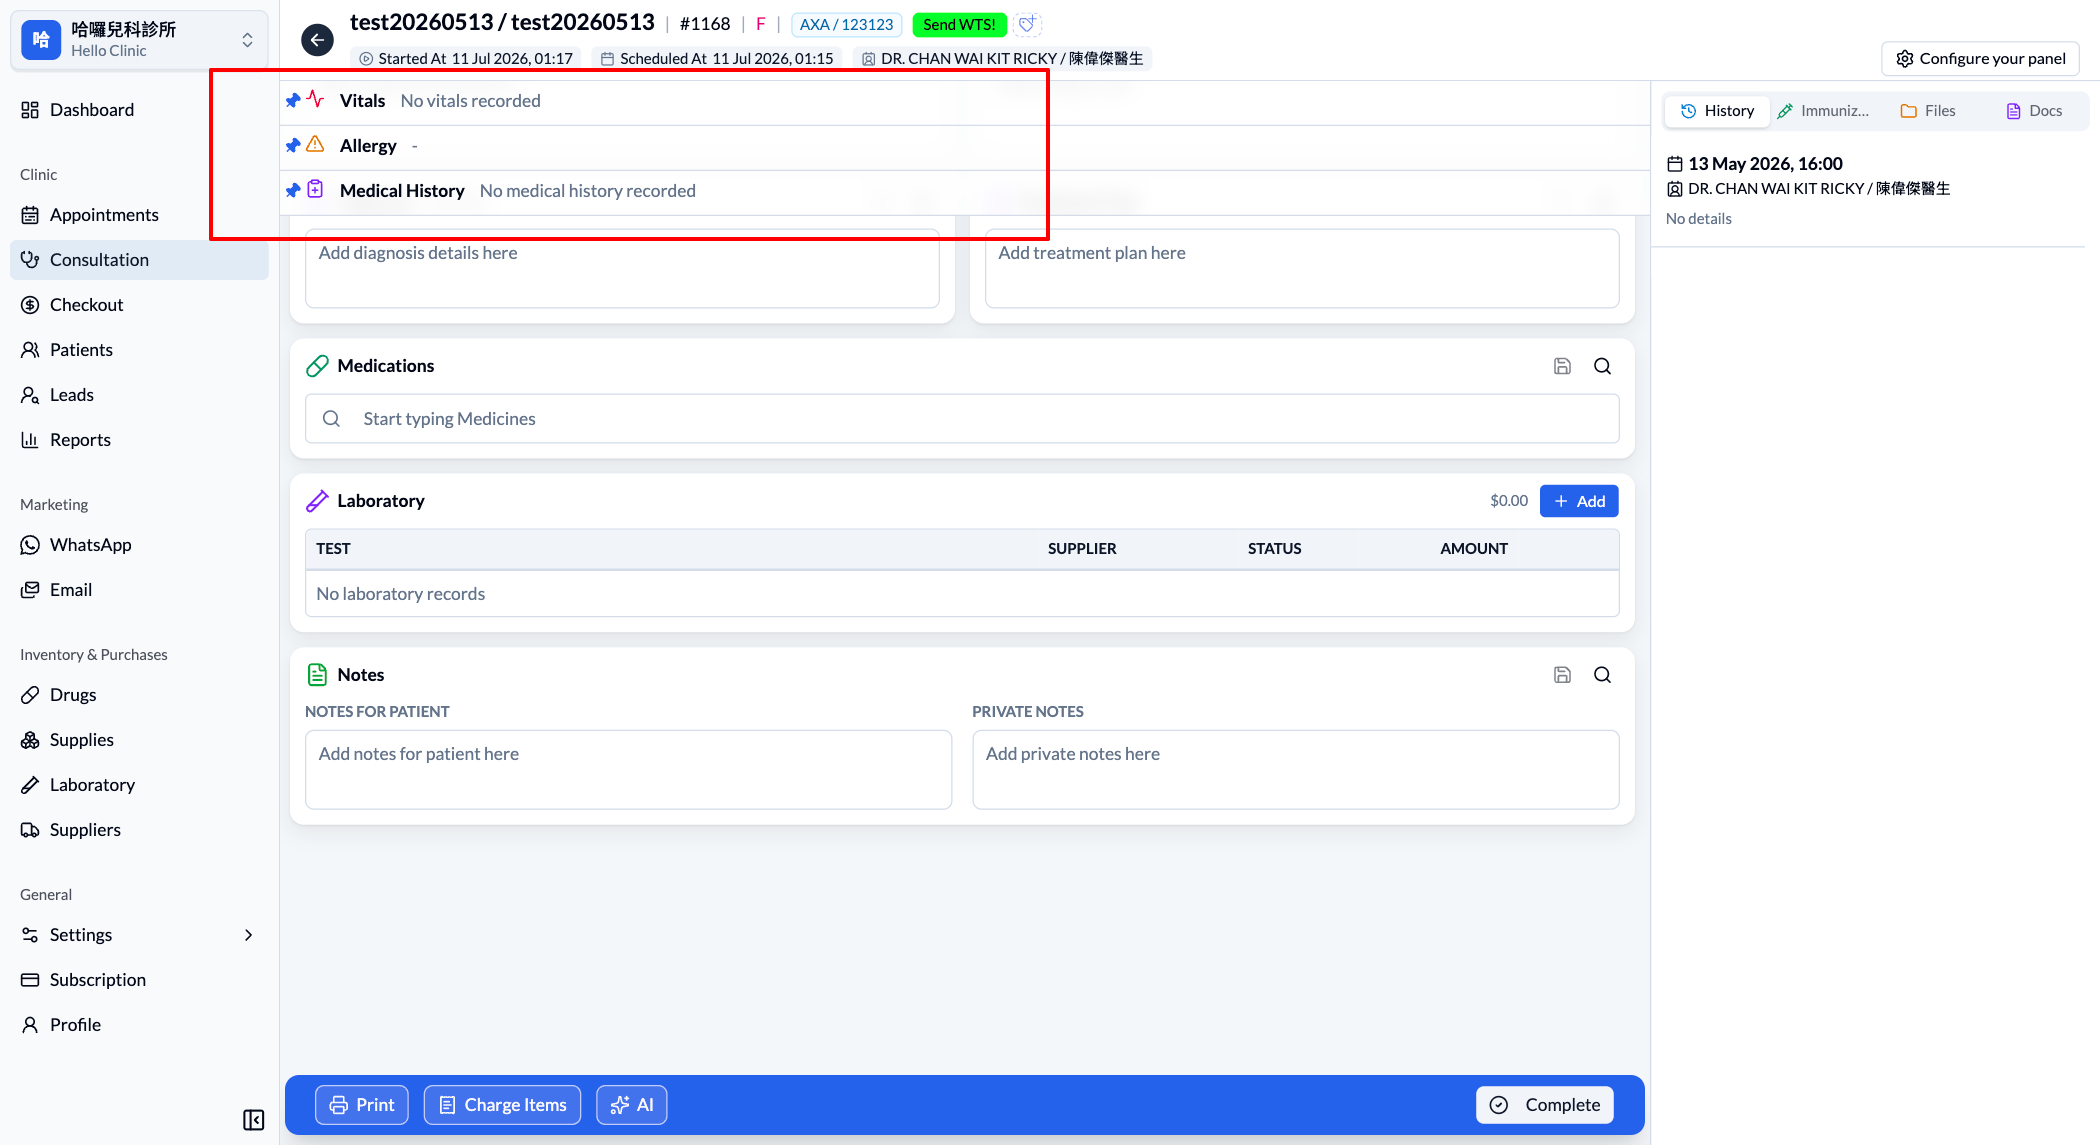
Vitals, Allergy, and Medical History each have a small pin beside the title. Select it to keep the relevant summary fixed at the top of the page. Important information remains visible while you work through Symptoms, Findings, or other record cards. Select Unpin summary to restore the usual layout.
5. Configure your panel around your workflow
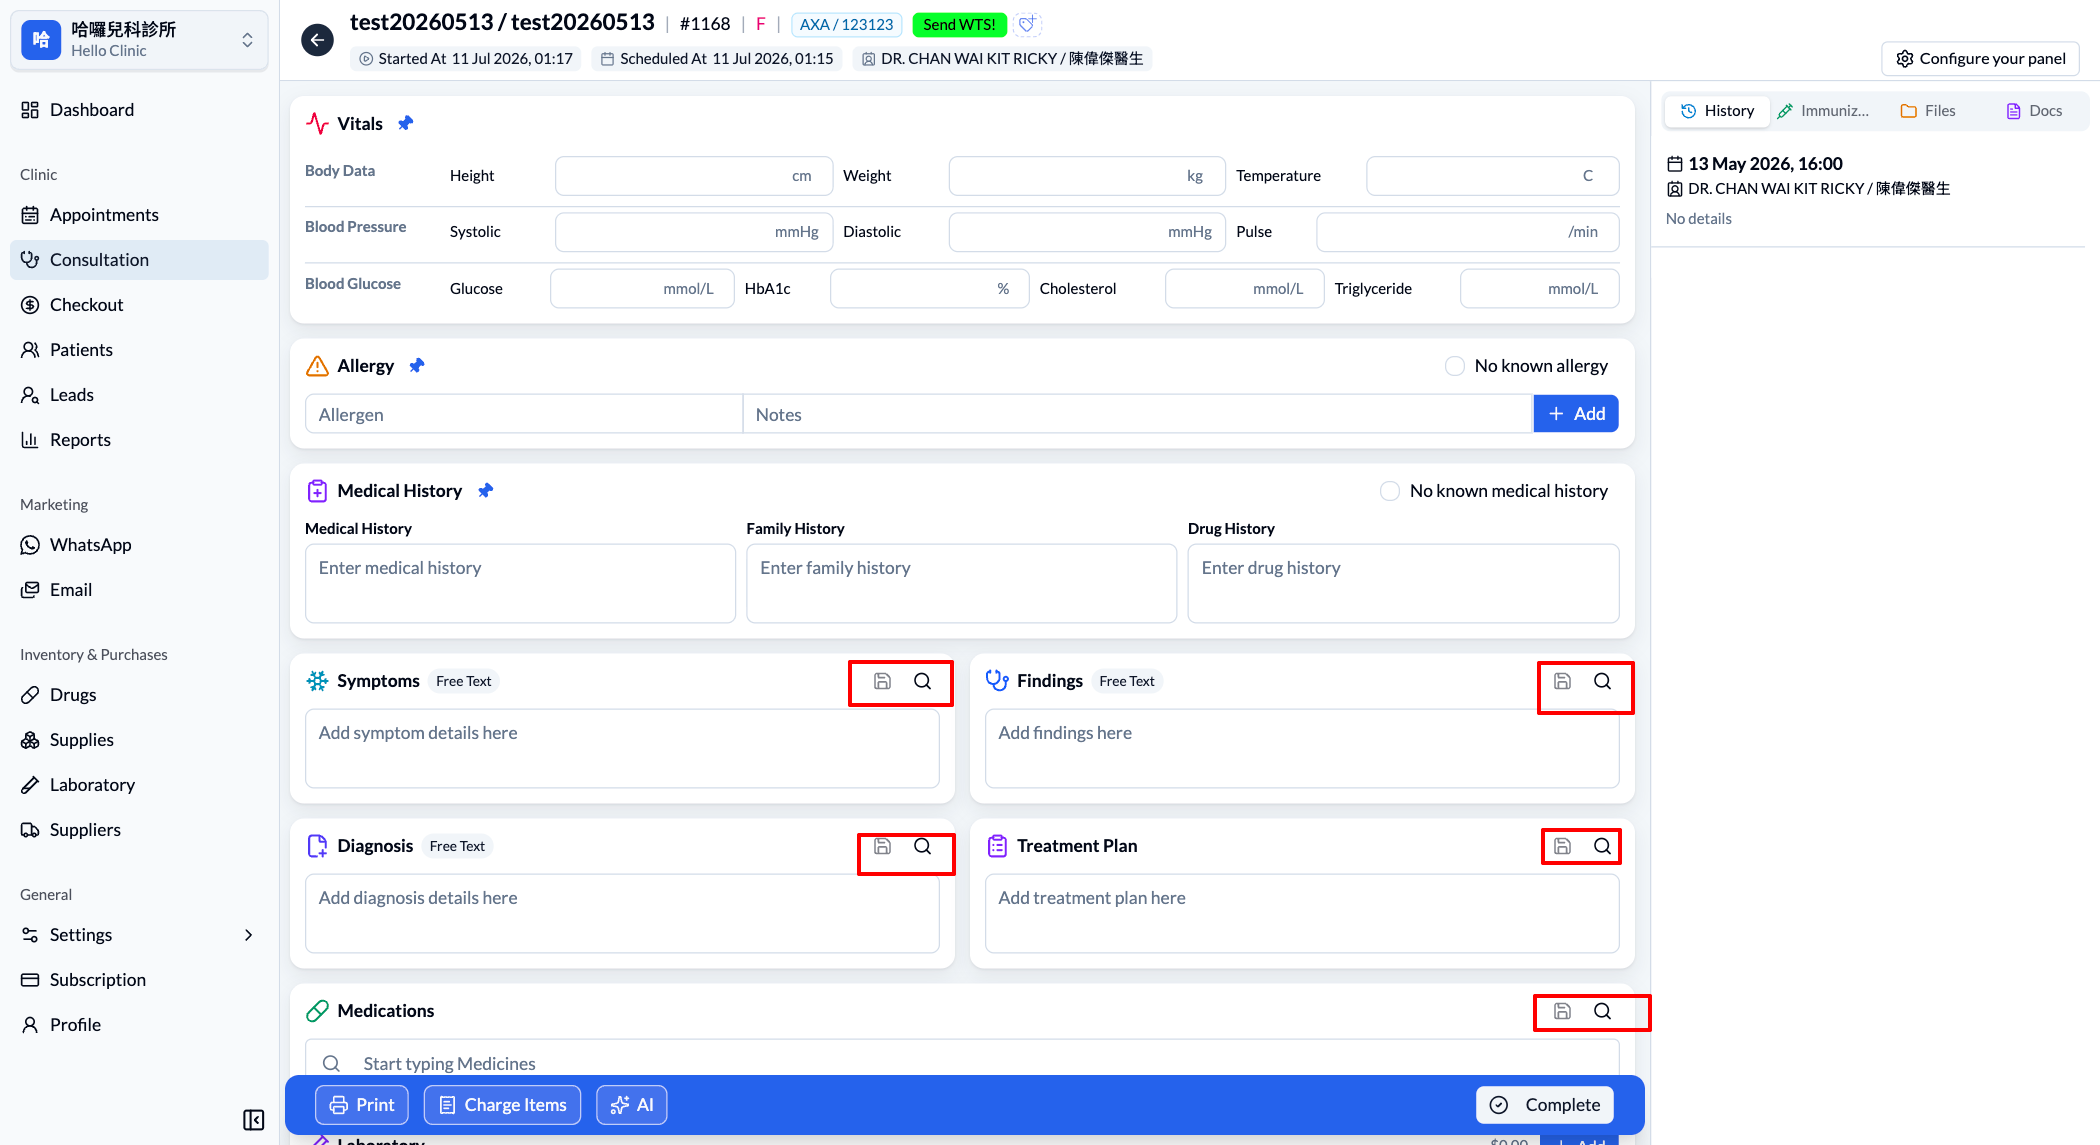
Every specialty and doctor records information differently. Select Configure your panel in the top-right corner to choose the record cards that matter to you, keeping frequently used information easy to reach.
Every saveable record card includes a Save icon in its top-right corner for preserving the content entered in the current visit. When you need similar content next time, select the Magnifier icon to search and bring in saved content instead of entering it again.
6. New Medications module: prescribe in a structured table
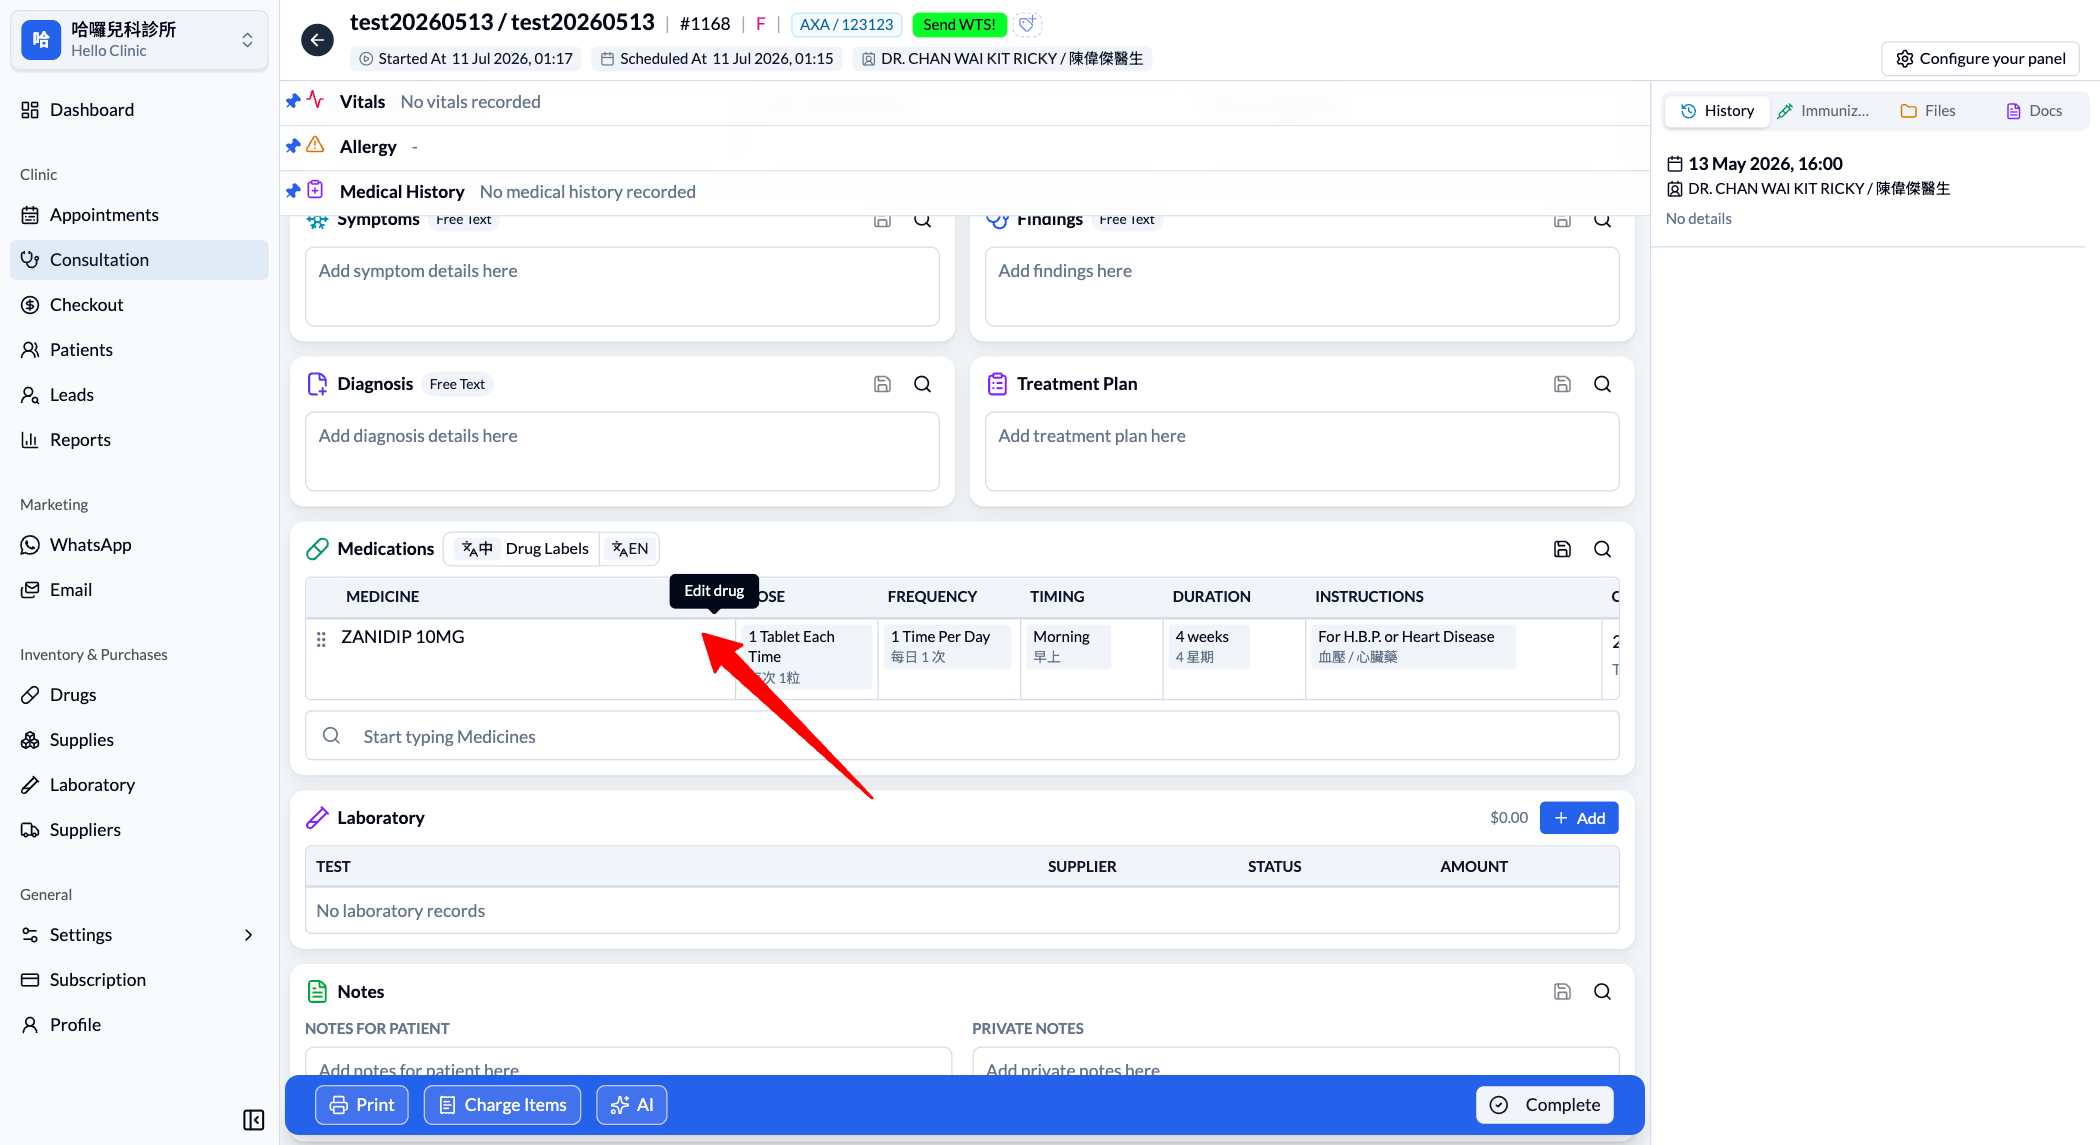
The new Medications module presents prescription details in a table, making it easy to review each field in one row:
- Medicine
- Dose
- Frequency
- Timing
- Duration
- Instructions
To adjust a medication’s default labels, hover over the medication name and select the Edit drug icon. This opens the edit screen for updating Drug Labels and other prescription display details.
7. Complete payment directly from Appointments
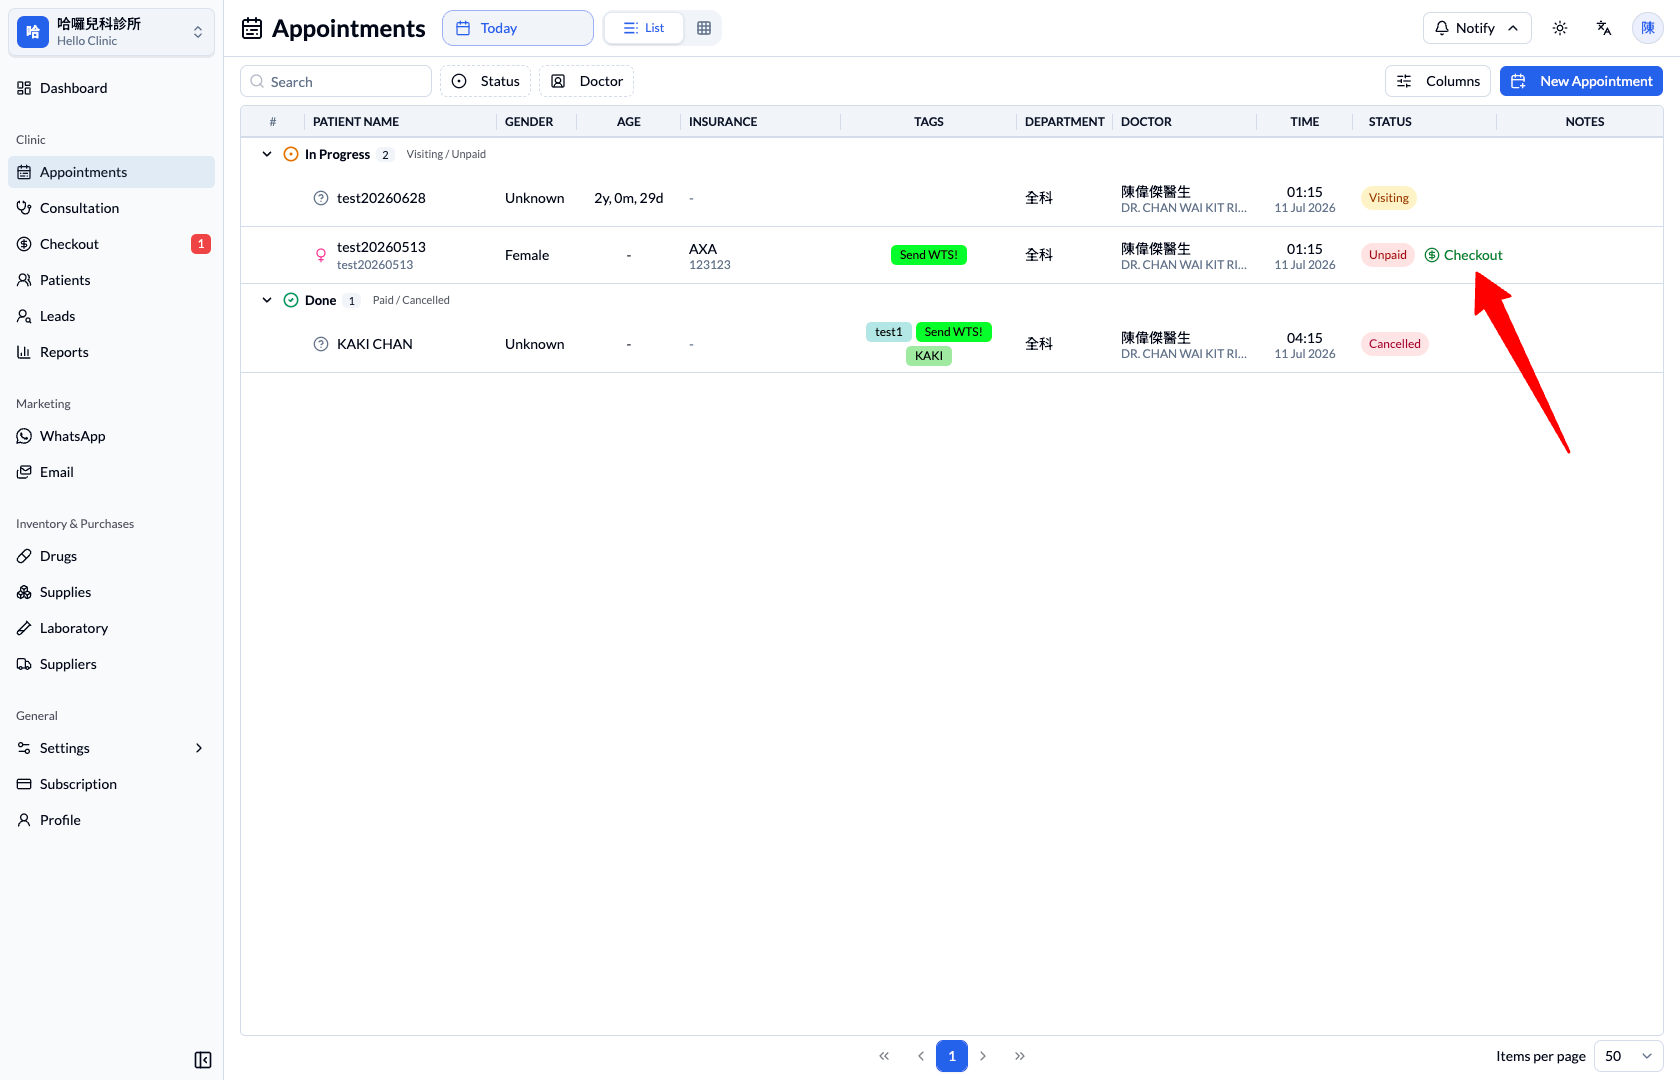
Payment is more direct too. Open the relevant appointment in Appointments, confirm the items to collect, and select Check Out to complete payment without moving between different pages.
A more connected consultation experience
This redesign brings the information doctors care about into one clear flow, helping them stay focused on the patient.
These are only the highlights of this update. There are many more improvements and refinements to discover across the system. Thank you for your continued support.
For questions about the new interface or to share feedback, contact us on WhatsApp at (852) 3500 7677.
The HelloClinic Team / KAKI TECH LIMITED